Getting Started
Payment Guide
Integration Tutorial
Fingerprint browser
Browser
Simulator
Proxy Manager
Operating System Settings
Integration Tutorial
Integration Tutorials
Fingerprint browser
Browser
Simulator
Operating System Settings
Integration Tutorial
Fingerprint browser
Browser
Simulator
Operating System Settings
PIA Client
Group Control APP
Step1:
Before integration, you need to complete the following preparations
1. Download, install and log in
2. Get the proxy IP, please refer to the tutorial: Get IP Proxy
Step2: Proxy configuration
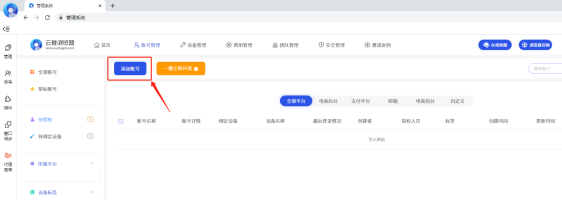
3. Log in to the YunLogin interface, click Account Management at the top

4. Click to add an account
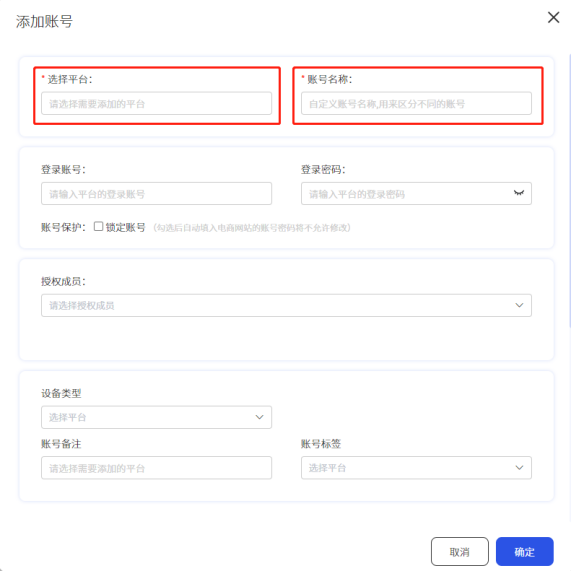
5. Select the corresponding platform and enter the account name
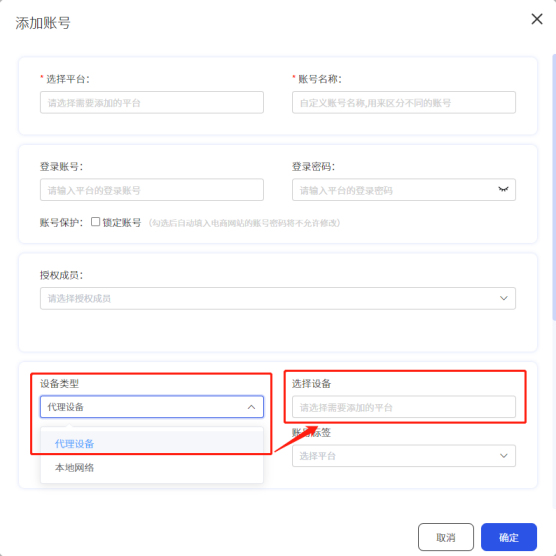
6. Select the proxy device for the proxy type, and then select the platform to be added
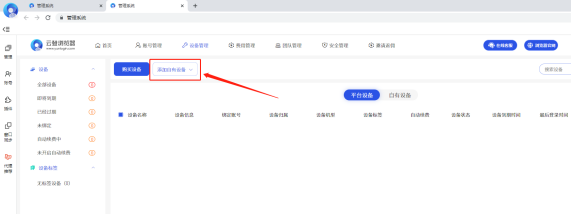
7. Device platform selection: Own device, then click to add
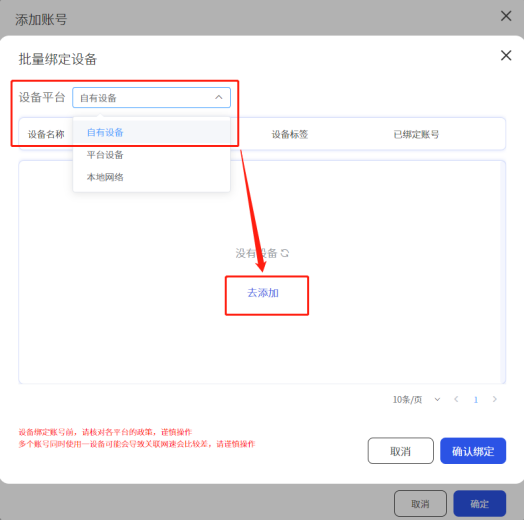
8. Click to add your own device
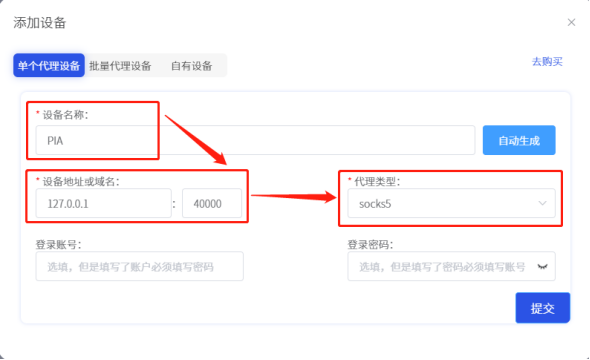
9. Add device to fill in the device name, enter the proxy IP, and select the proxy type as socks5
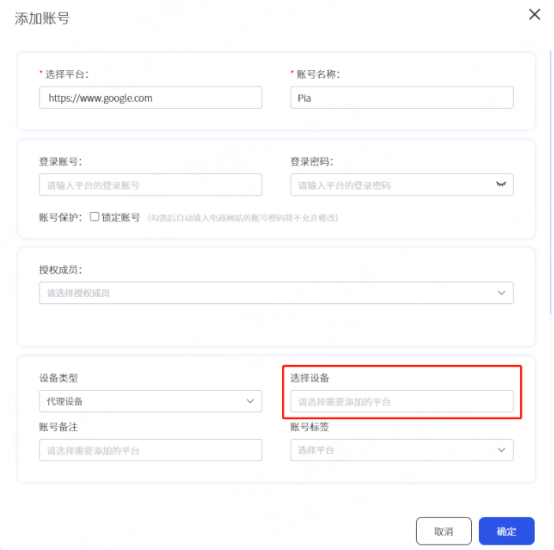
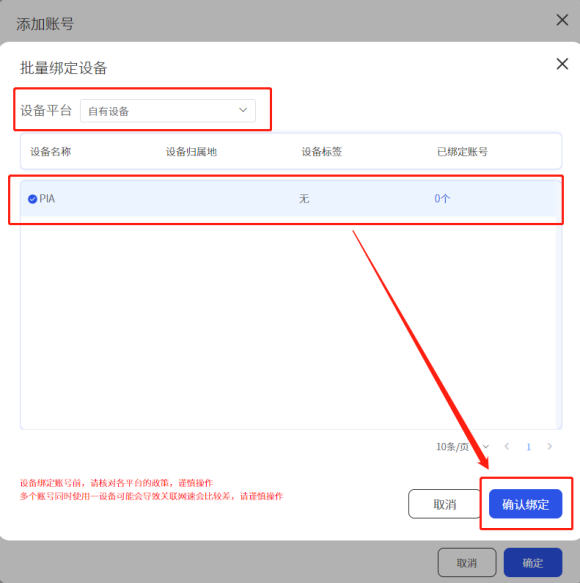
10. Then return to the page of adding an account, click to select the device, then select your own device, click the proxy you just set, and click to confirm the binding
11. After the setting is complete, click the start button
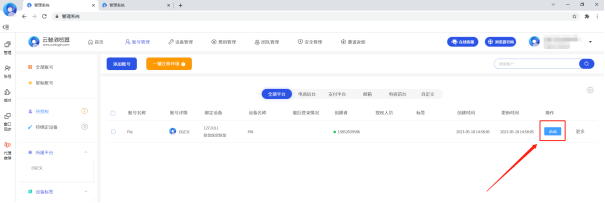
12. Click to open the account
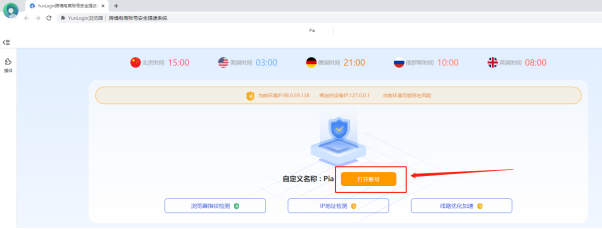
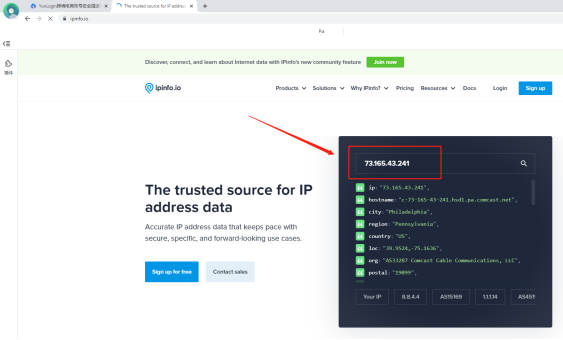
13. query the IP of the browser in ipinfo, which is also the IP address after the proxy!
This document provides you with everything you need to get started with our proxy
If you can't find something or need assistance, please contact us at [email protected] or via our 24/7 live chat.
Our file has two main parts. The first one is dedicated to PIA proxy integration proxy and the second one is dedicated to the use of the free tool
This section contains information about using free tools, where you can find the specific process and method for configuring each tool and proxy IP. Choose the proxy tool that's right for you and follow the guidelines for smooth integration.
If you need any assistance, please feel free to contact us at [email protected] We will try our best to help you solve the problem.
How long can I use the proxy?
How to use the proxy ip I used before?
How long does it take to receive the proxy balance or get my new account activated after the payment?
Can I only buy proxies from a specific country?
Can colleagues from my company use the same account as me?
Help Center