How to set up a proxy server on the Firefox browser
This guide will walk you through the steps needed to configure a proxy server in the Firefox browser, including screenshots and important tips when choosing a proxy
A proxy helps protect your privacy by allowing you to browse the web anonymously. Additionally, proxy servers can improve your internet speed and security by caching regularly requested content.
There are many reasons why you might want to use a proxy server. Maybe you're concerned about your privacy and want to protect your data.
For your convenience, here's a complete step-by-step guide:
Step one: Download and install the Firefox browser
Step Two: Add Proxy Settings
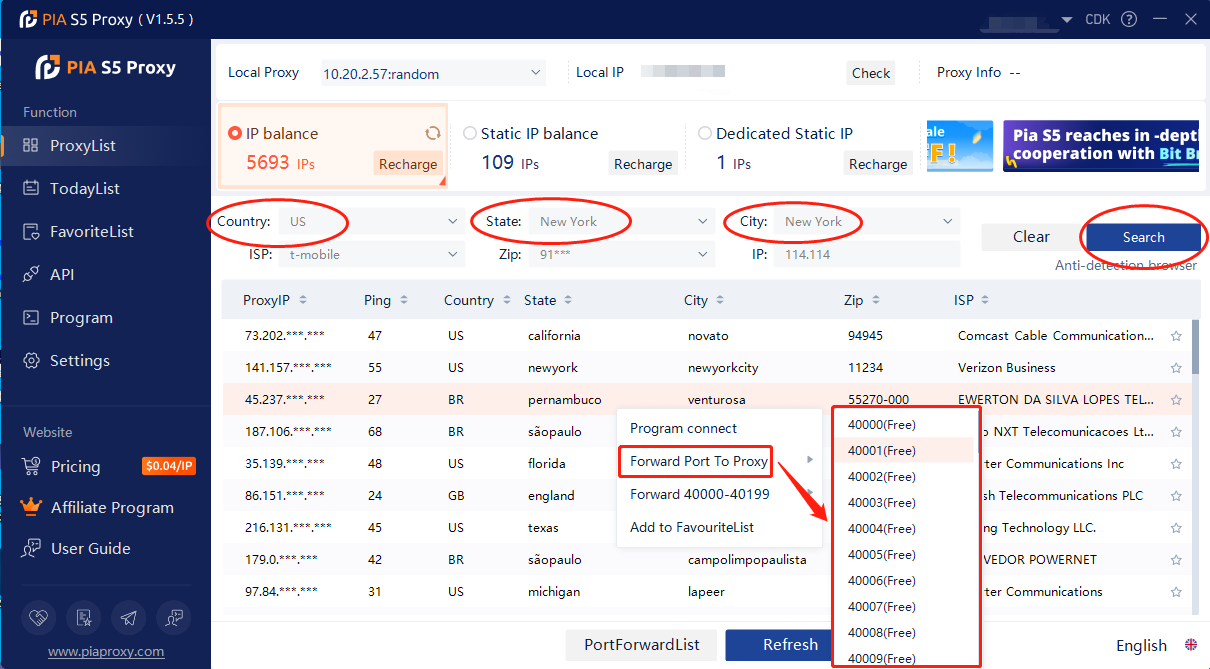
1. After selecting the country, continent, and city, click the "Refresh" button, then right-click to select the proxy IP and port
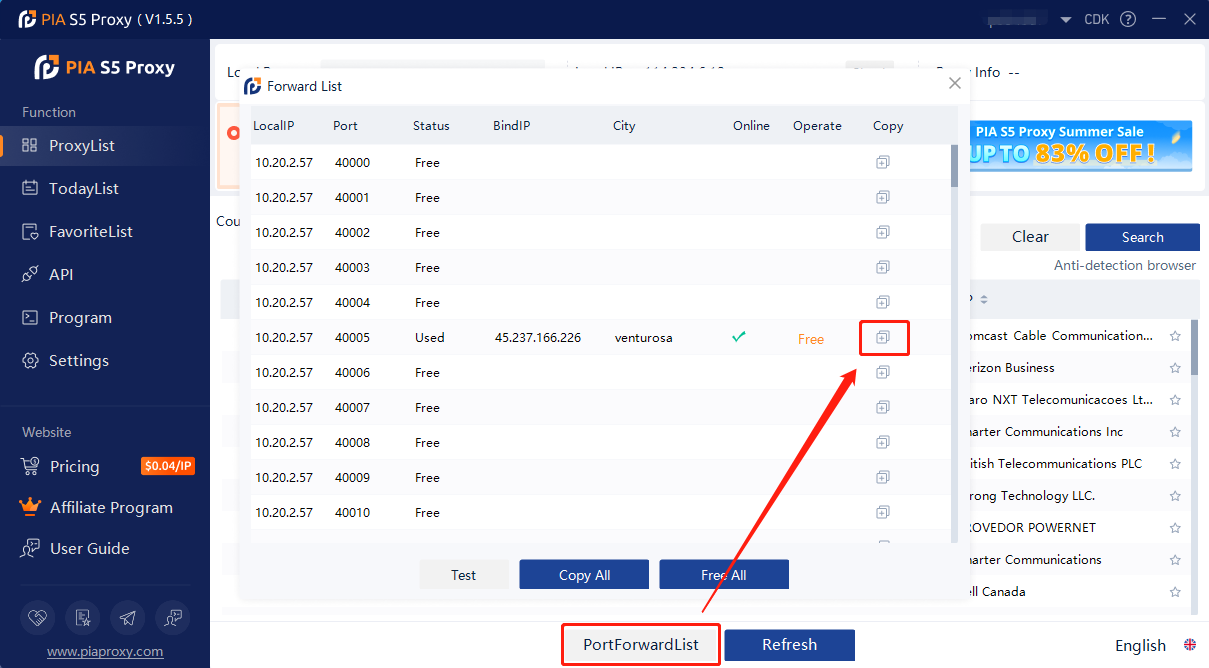
2. Then click the port forwarding list below and copy the port number you just selected
Step Three: Add Proxy Settings
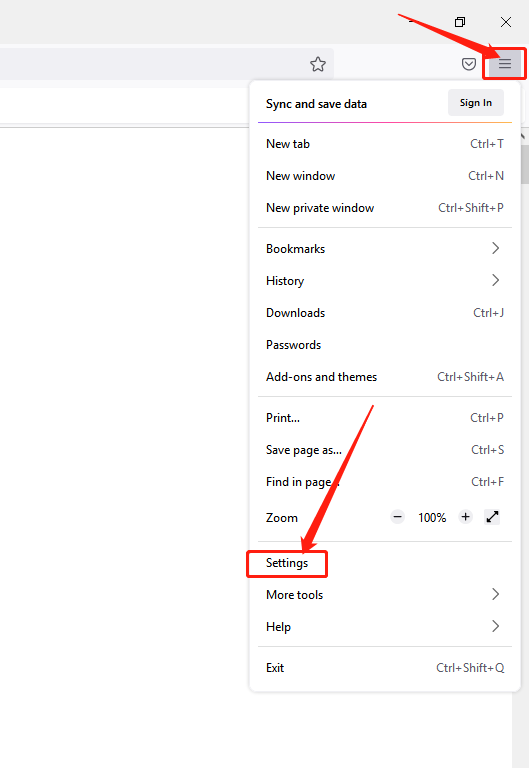
1. Open the browser, click "Menu Bar" - "Settings" in the upper right corner.
2. Find the module in the "Network Settings" dialog box, and click "Settings".

3. Select "Manual Settings" and fill in the obtained proxy IP address and port in the dialog box.
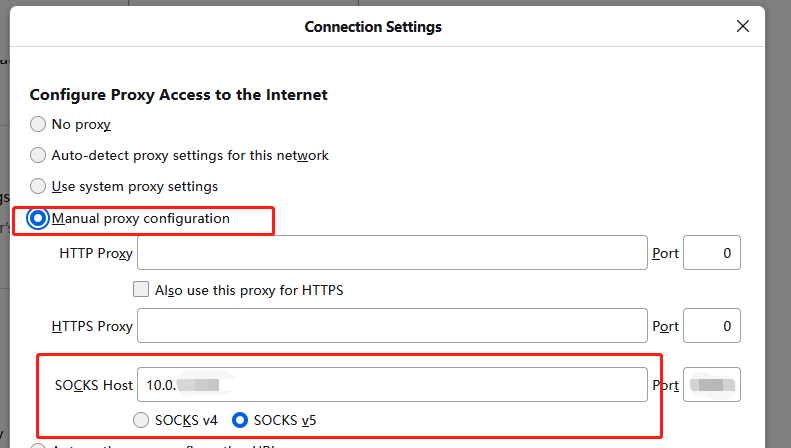
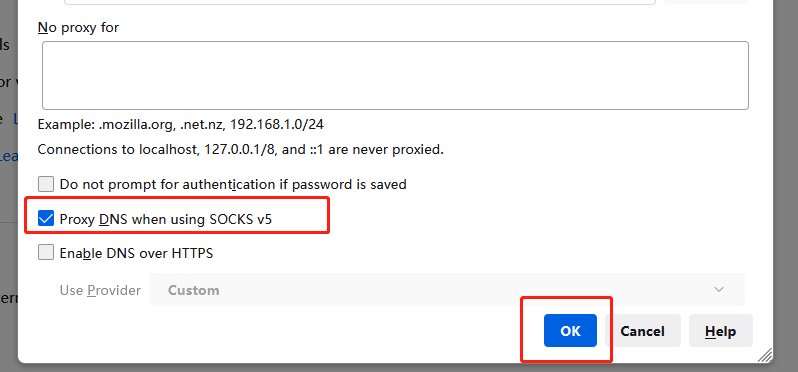
4. Check "Proxy DNS when using socks v5" and confirm.
Click to view detailed video tutorial——
Follow the process above and you're ready to go with Firefox. If you have any questions about the integration, or want to learn more about other topics, you can consult the online customer service for help


