How to set up proxy server on Ximera browser
The benefits of using the Ximera browser include:
Better browsing experience: Ximera browser adopts the latest browser engine technology, which can quickly load web pages and execute JavaScript codes, allowing users to have a smoother browsing experience.
Higher security: Ximera browser has a number of security measures, such as powerful anti-virus technology and anti-hacker attack functions, which can effectively protect user privacy and data security.
More customization options: Ximera browser supports a variety of plug-ins and themes, and users can customize it according to their own needs, making the browser more in line with their own usage habits.
More lightweight: The installation package of Ximera browser is very small, occupying less system resources, suitable for use on low-end computers.
step 1:
Download and install Ximera
Website: https://ximera.pro/?p=PIA
Step 2:
Add proxy settings
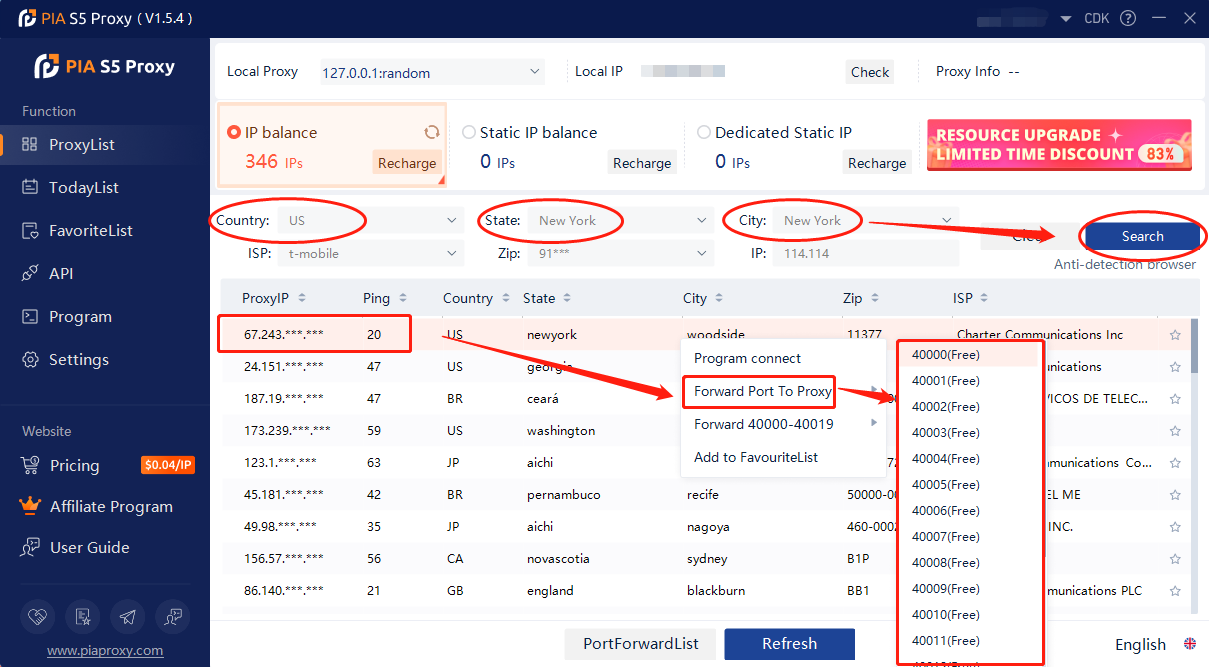
1. After selecting the country, continent, and city, click the "Refresh" button, then right-click to select the proxy IP and port
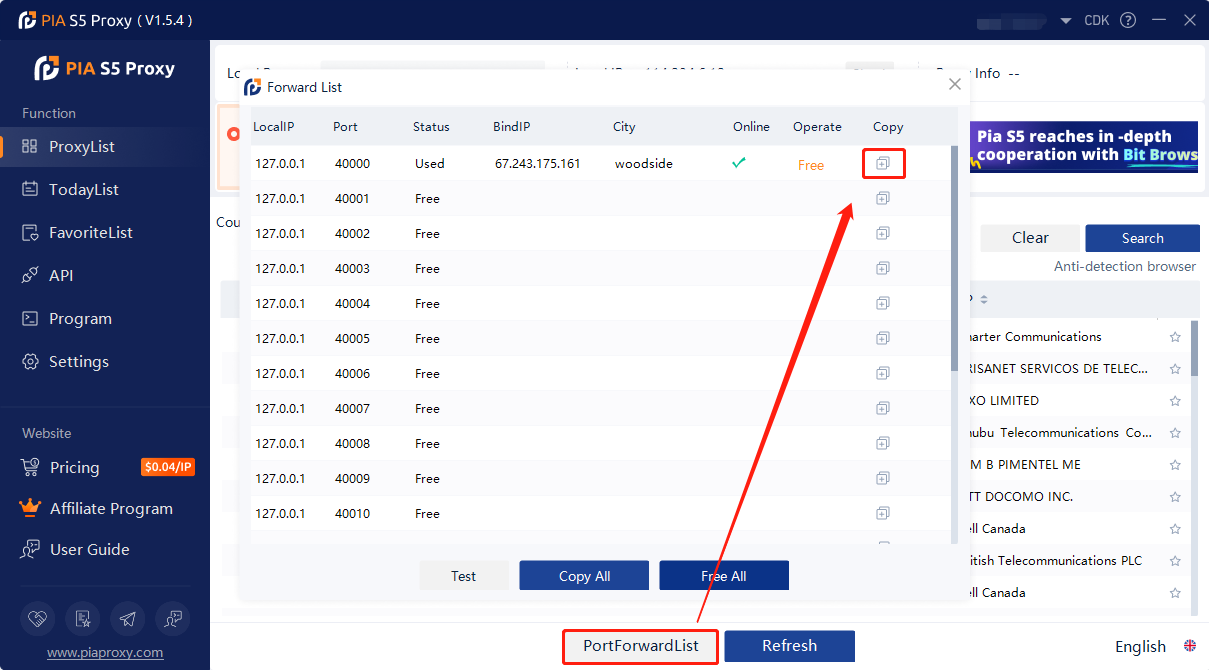
2. Then click the port forwarding list below and copy the port number you just selected
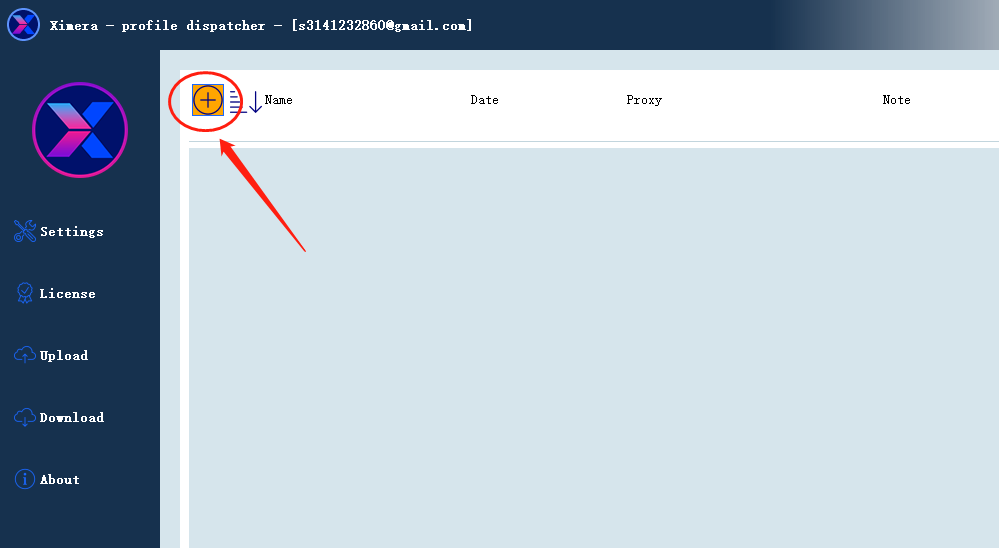
3. After logging in to Ximera, click the "+" button in the upper left corner
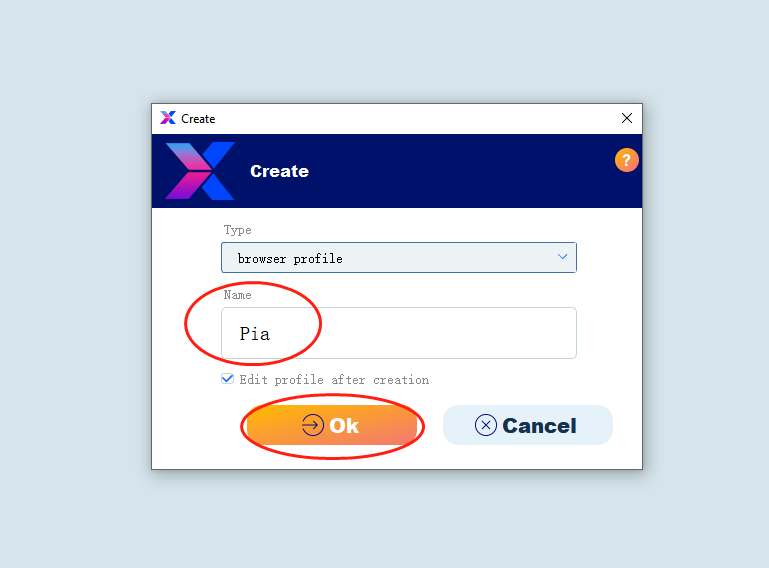
4. Enter a name and click OK
5. Tap the pencil button
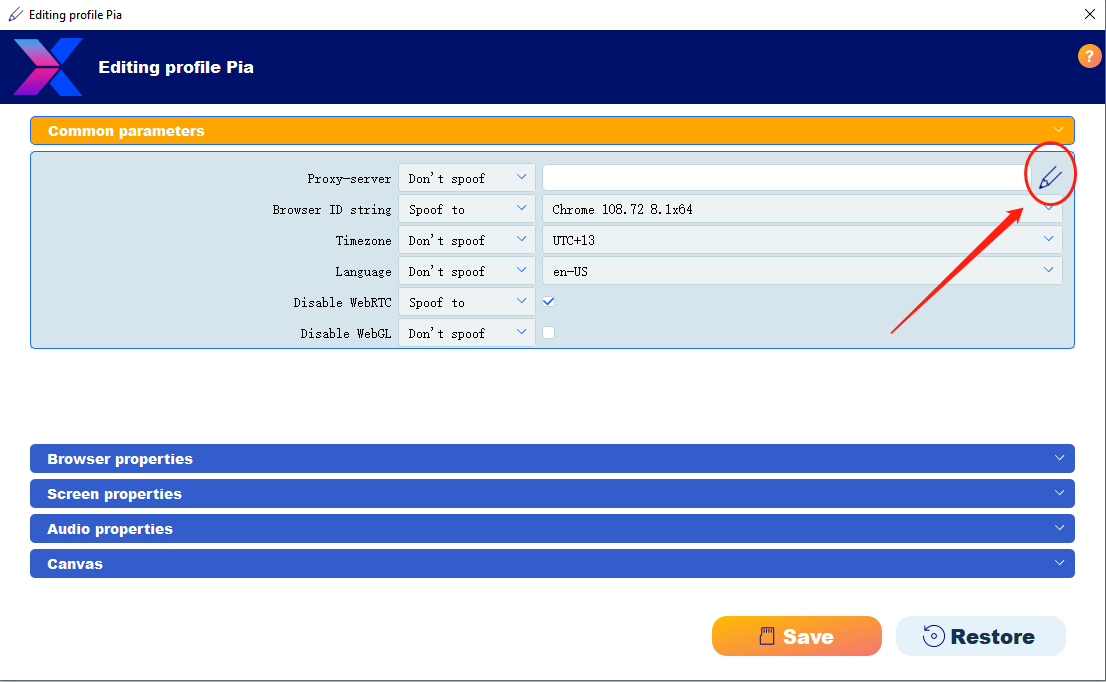
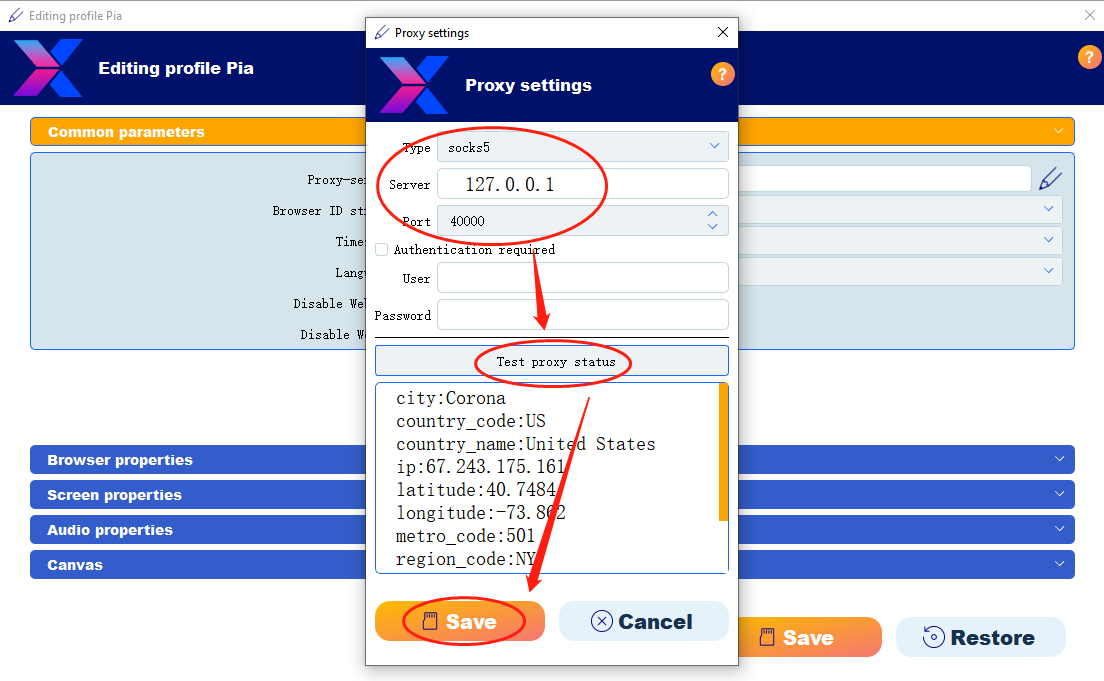
6. Paste the proxy IP and port just copied, then click Test Proxy, click Save after the test is successful
7. Select spoof to as the proxy server
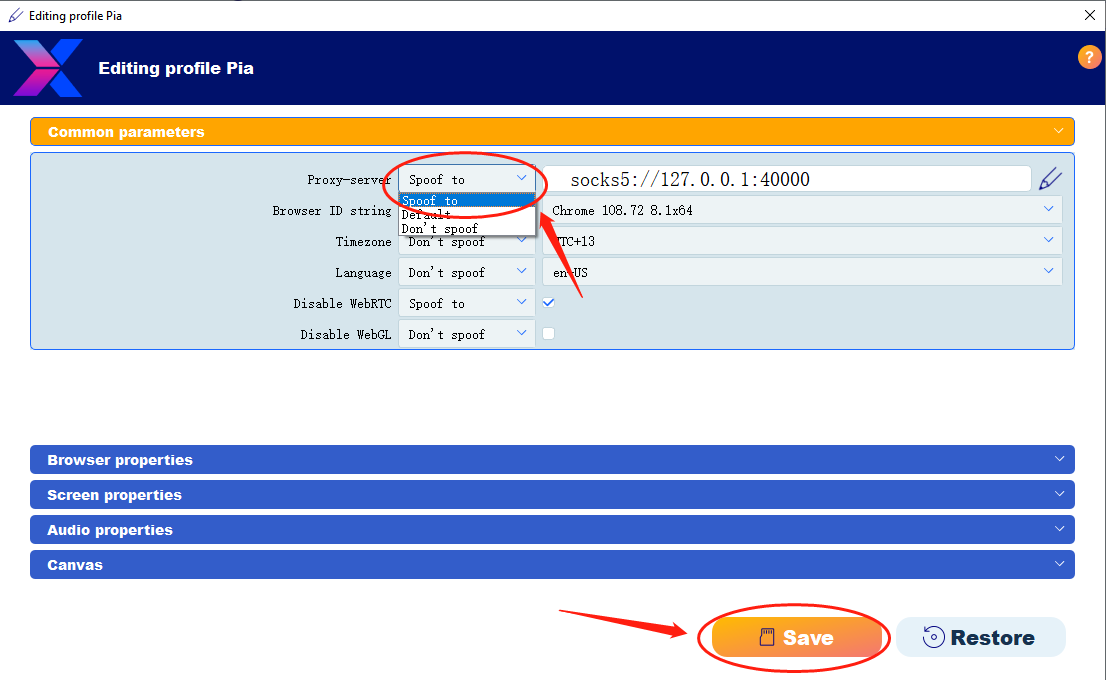
8. After saving successfully, click to start the browser

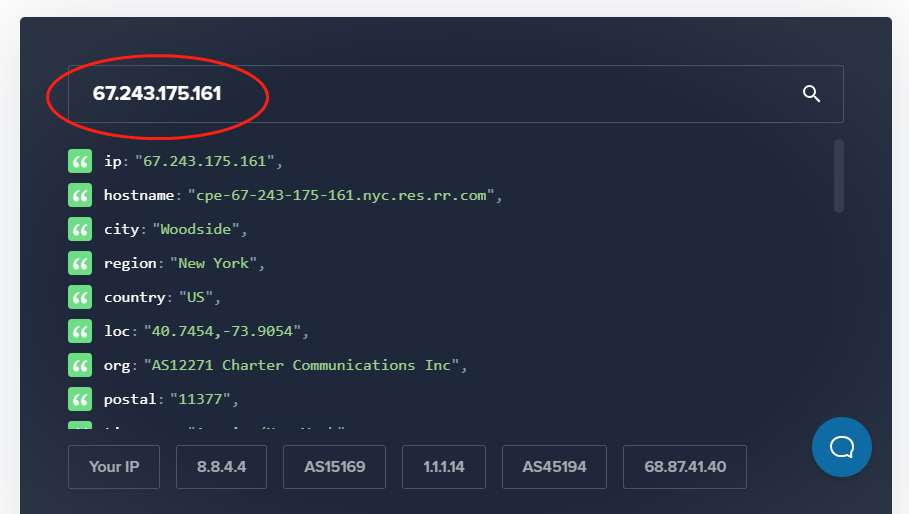
9. The proxy setting is successful
Click to view detailed video tutorial——
According to the above process, you can start using Ximera browser. If you have any questions about the integration, or want to learn more about other topics, you can consult the online customer service for help


