How to setup PIA S5 Proxy in Google Chrome
The main benefits of Google Chrome:
1. Fast loading: Google Chrome uses some technologies to speed up the loading of web pages, such as preloading and parallel connections.
2. Security: Google Chrome has a variety of built-in security features, such as automatic blocking of malware and a strong password generator, etc., which can help you protect your personal information and device security.
3. User experience: Google Chrome provides a concise and clear user interface and rich extension functions, which can help you browse web pages and manage bookmarks more conveniently.
4. Synchronization function: Google Chrome can synchronize with your Google account, and can synchronize your bookmarks, history, extensions and other settings, so that you can use the same browser experience on different devices.
5. Compatibility: Google Chrome supports a variety of operating systems and device types, including desktop computers, laptop computers, mobile phones and tablet computers, etc., to meet the needs of different users.
step 1:
Download and install Google Chrome
Step 2: Add proxy settings
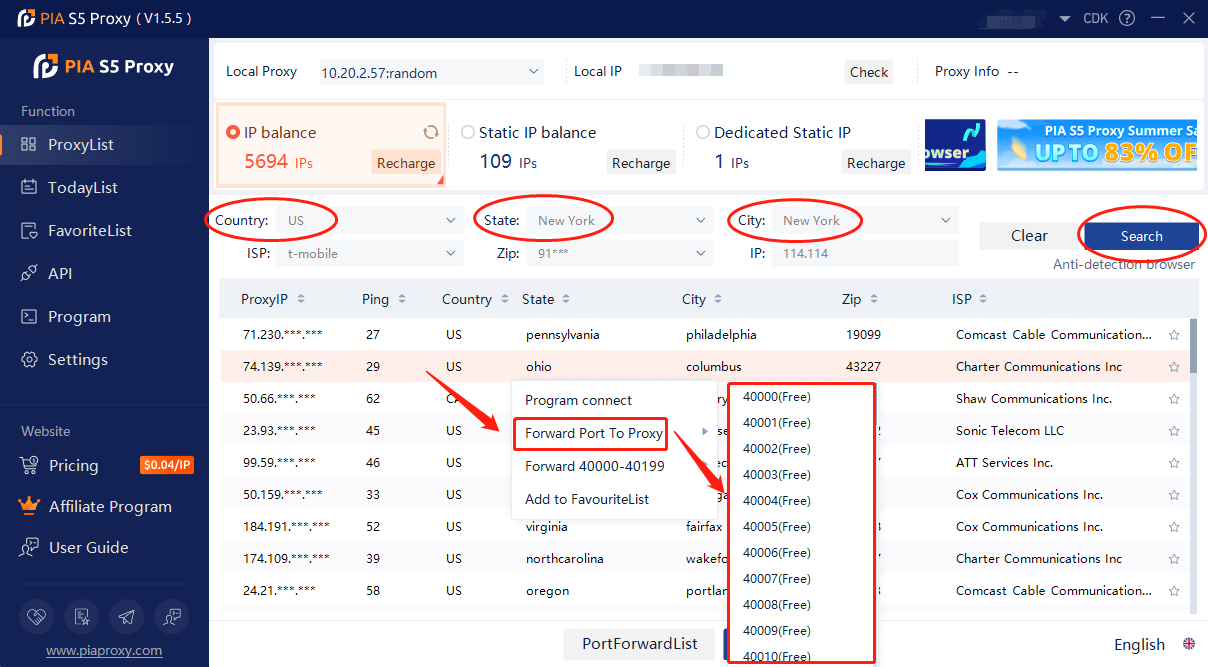
1. After selecting the country, continent, and city, click the "Refresh" button, then right-click to select the proxy IP and port
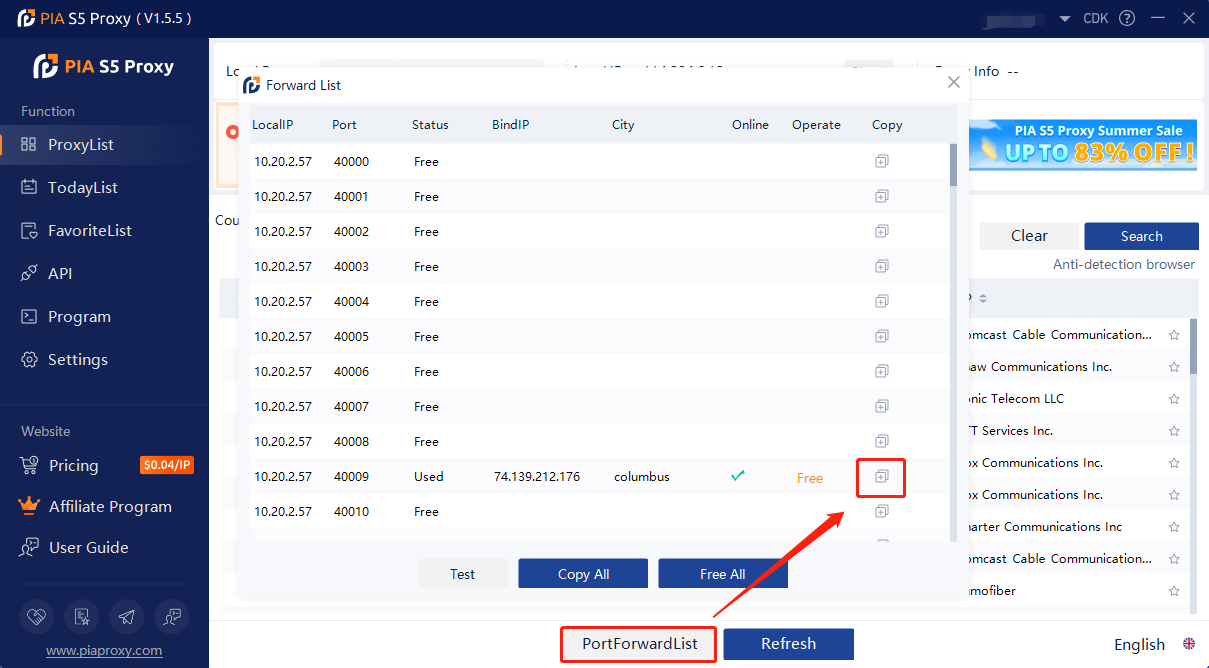
2. Then click the port forwarding list below and copy the port number you just selected
Step 3: Add proxy settings
Settings > System > Open your computer's proxy settings > OS settings
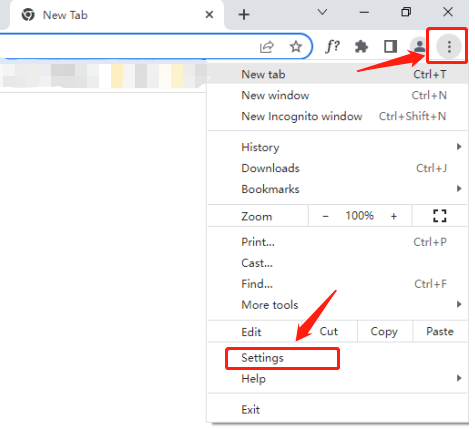
1. Click the drop-down box in the upper right corner of the browser to open the settings.
2. Select System from the left list of Settings.
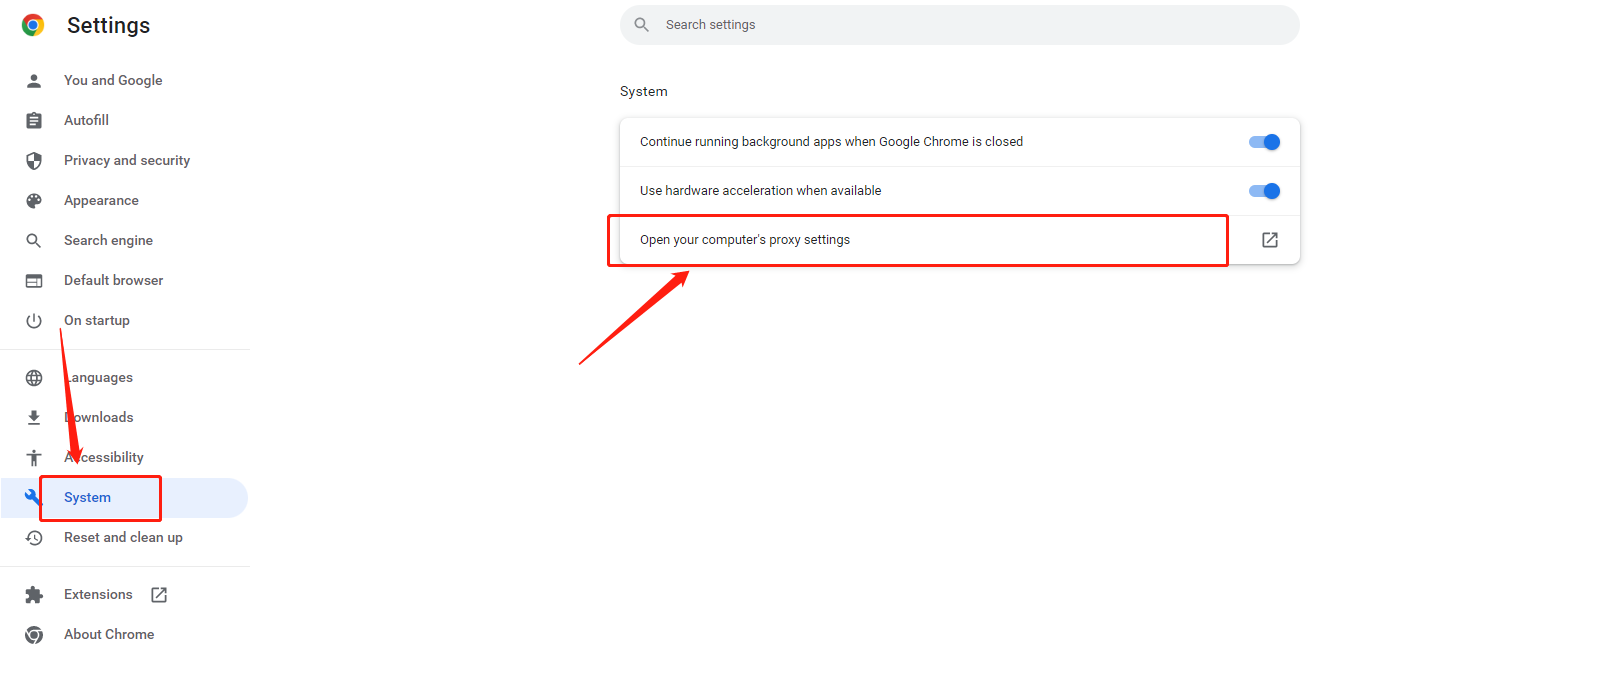
3. Click to open your computer's proxy settings.
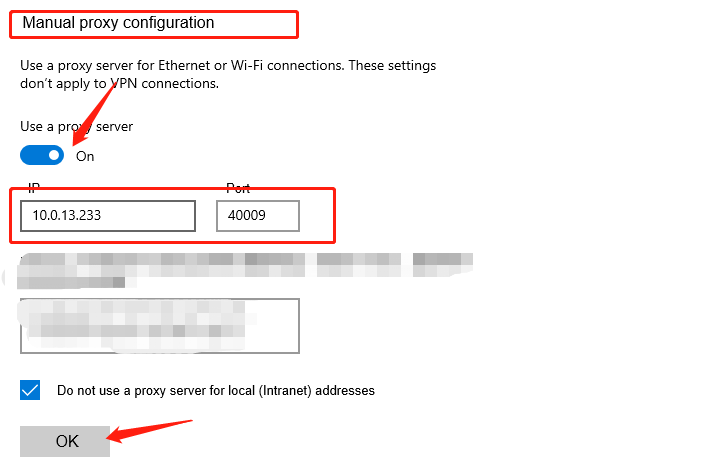
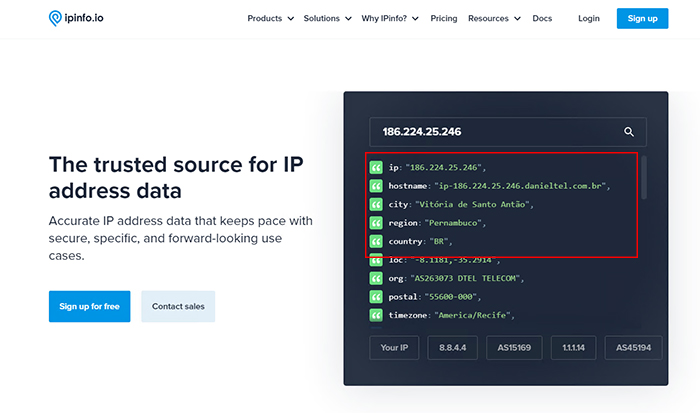
4. Open a new window to view the IP, you can see that it is the assigned agent
Click to view detailed video tutorial——
Follow the process above and you're ready to get started with Google Chrome. If you have any questions about the integration, or want to learn more about other topics, you can consult the online customer service for help


