Telegram Proxy Settings with Pia S5 Proxy
1. Why configure a proxy in Telegram
Enhanced privacy protection:
Telegram is known for its end-to-end encrypted communication function, which can ensure the security and privacy of user communication content. When used in conjunction with Pia S5 Proxy, users can further hide their real IP address, adding a layer of protection to prevent network activities from being tracked or monitored.
Flexible proxy configuration:
Pia S5 Proxy provides flexible proxy configuration options, allowing users to personalize settings according to specific needs. Combined with proxy management tools such as FoxyProxy, users can easily configure proxies in Telegram to achieve fast switching and smart routing, and optimize network experience.
Increase access speed:
For users who need to access foreign servers or content, Pia S5 Proxy's high-speed proxy servers can significantly improve access speed and reduce latency. Configuring such a proxy in Telegram allows users to chat, transfer files, and share media more smoothly.
Bypassing geographical restrictions:
Some Telegram groups or channels may not be directly accessible due to geographical restrictions. Through Pia S5 Proxy's proxy settings, users can easily bypass these restrictions, access Telegram content around the world, and enjoy a richer social experience.
Enhanced network security:
In addition to privacy protection, Pia S5 Proxy's proxy settings can also enhance the security of users in the network environment. By encrypting transmission and hiding IP addresses, users can reduce the risk of cyber attacks and malware infections, and protect personal data and device security.
2. How to configure the proxy
Step 1:
Download and install Telegram
Step 2:
Add proxy settings
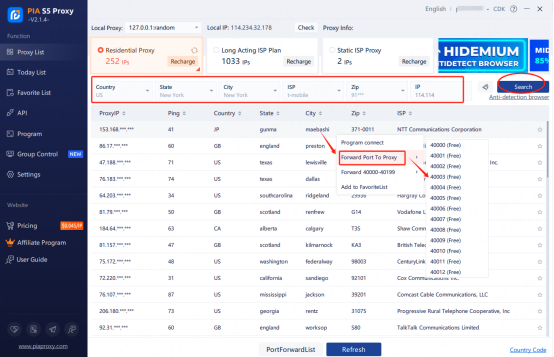
After selecting the country, continent, and city, click the "Refresh" button, then right-click and select the proxy IP and port
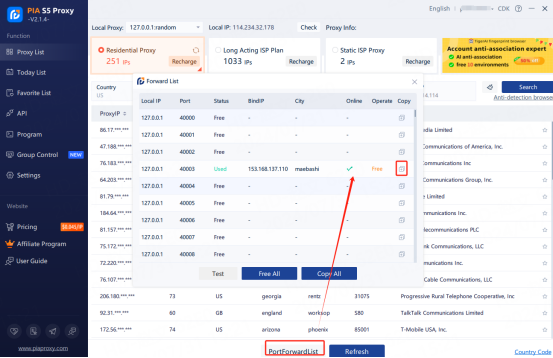
Then click the port forwarding list below and copy the port number you just selected
Step 3:
1. Start telegram and set it up on a single machine
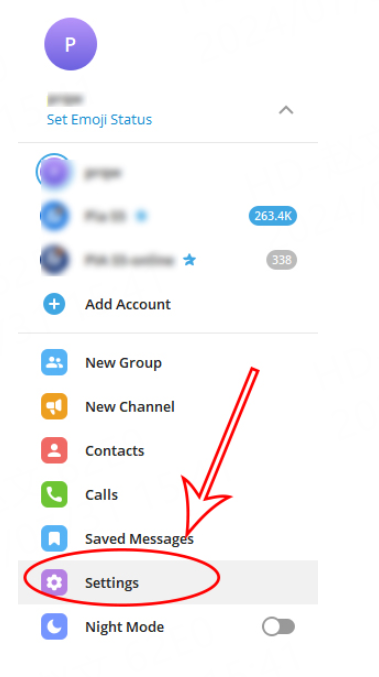
2. Click Advanced
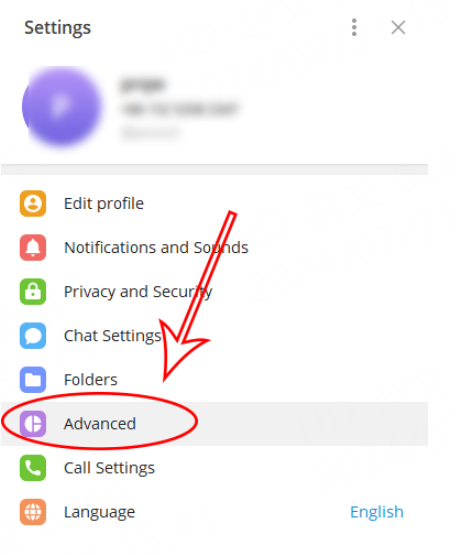
3. Click the connection type

4. Click Use custom proxy
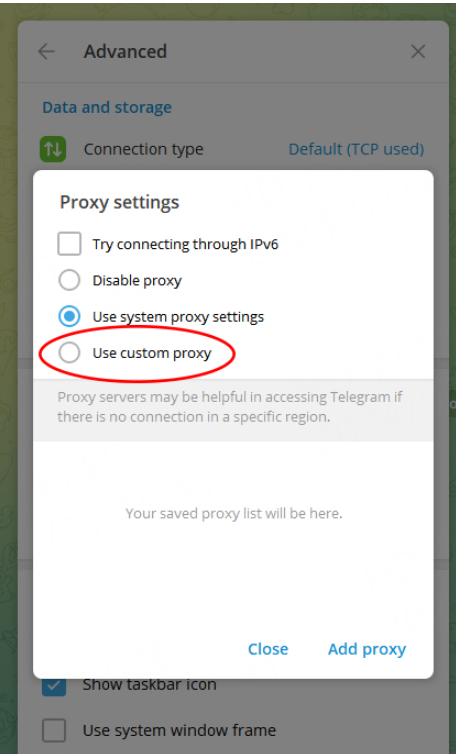
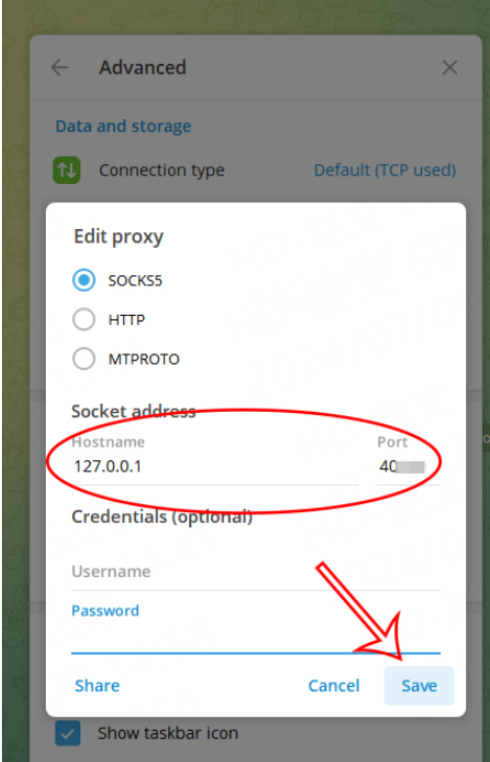
5. Enter the proxy credentials and click Save

6. Proxy automatically connects
