How to setup a proxy server on ClonBrowser
CloneBrowser is a tool for managing multiple GitHub accounts, which provides the following benefits:
Manage multiple accounts: CloneBrowser can easily manage multiple GitHub accounts without frequently switching accounts.
Simplified workflow: Using CloneBrowser can simplify operations such as cloning, pulling, and pushing to a few clicks, thereby improving work efficiency.
Enhanced security: CloneBrowser can set up separate SSH keys for each account, thus enhancing security.
Improved reliability: Using CloneBrowser reduces human error and avoids confusion between different accounts.
In short, CloneBrowser is a very practical tool that can help developers manage multiple GitHub accounts more easily, improving work efficiency and security.
step 1:
Download and install ClonBrowser
Website: https://www.clonbrowser.com/?p=PIA
Step 2:
Add proxy settings
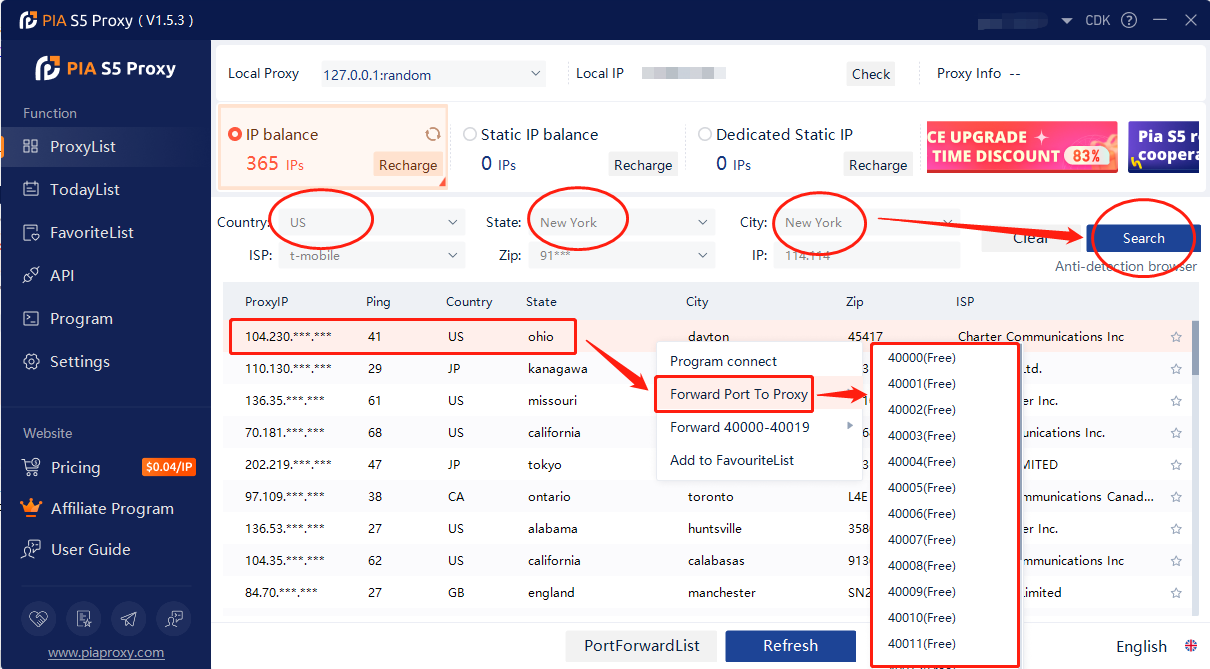
1. After selecting the country, continent, and city, click the "Refresh" button, then right-click to select the proxy IP and port
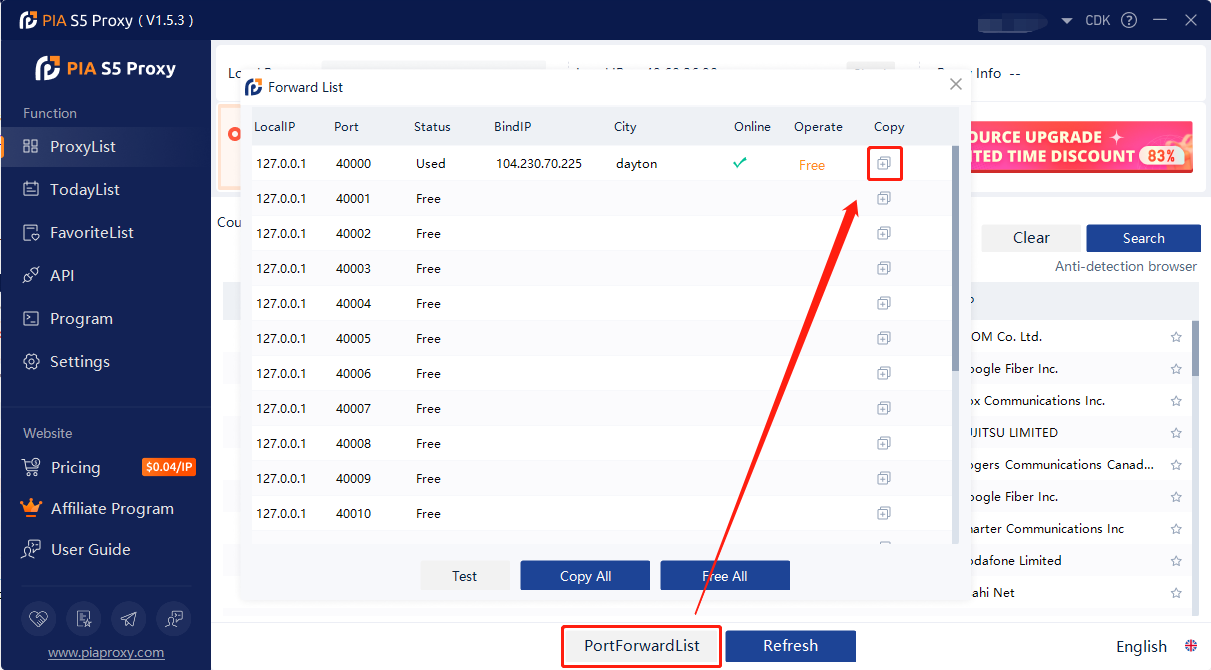
2. Then click the port forwarding list below and copy the port number you just selected
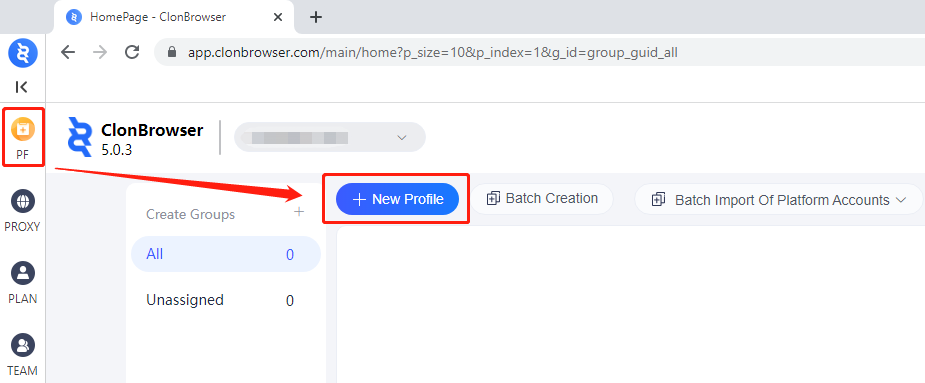
3. Open ClonBrowser, click PF > New Profile
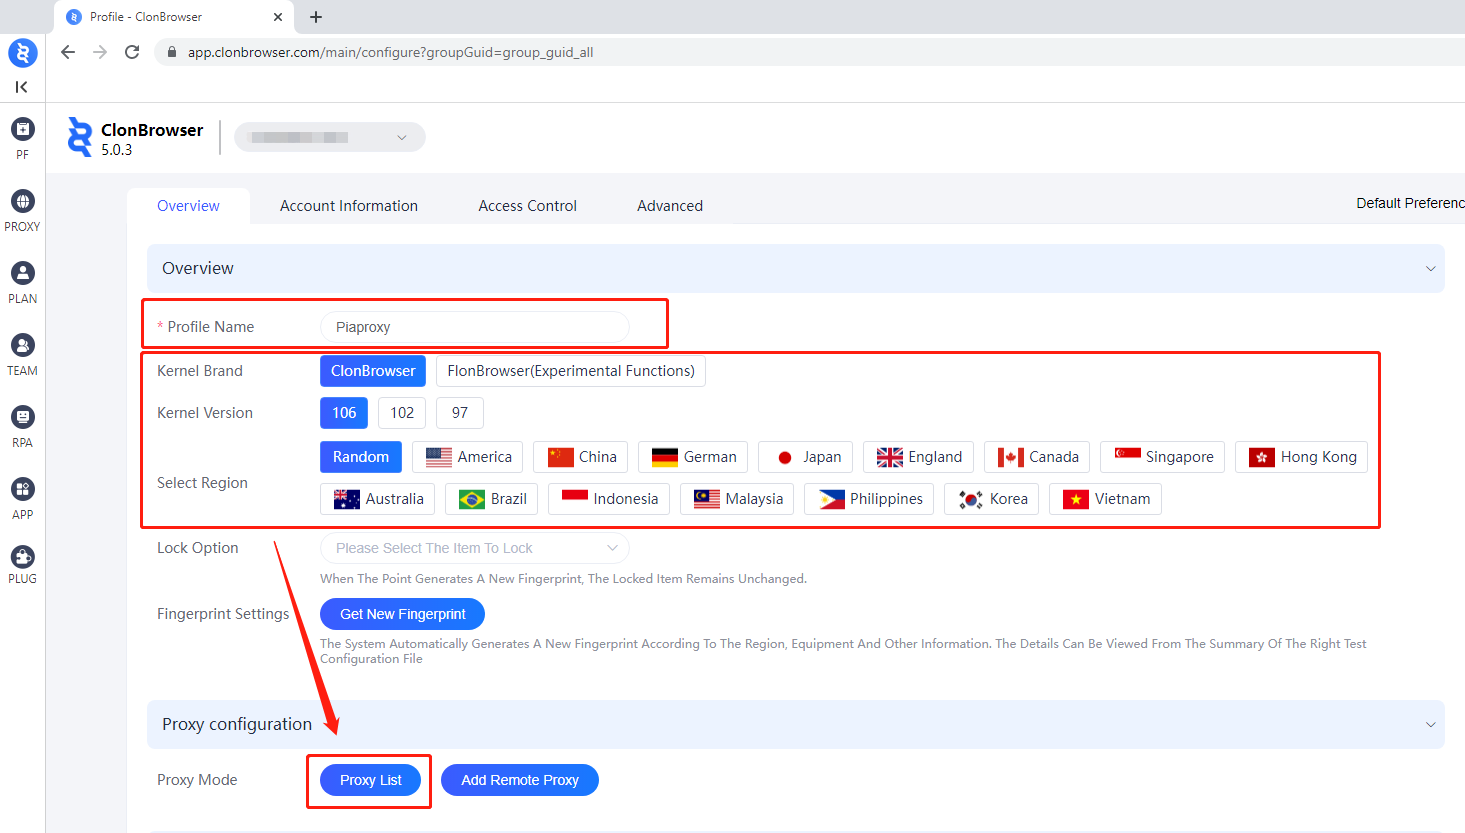
4. Then enter the name, select the country and region, and click the agent list
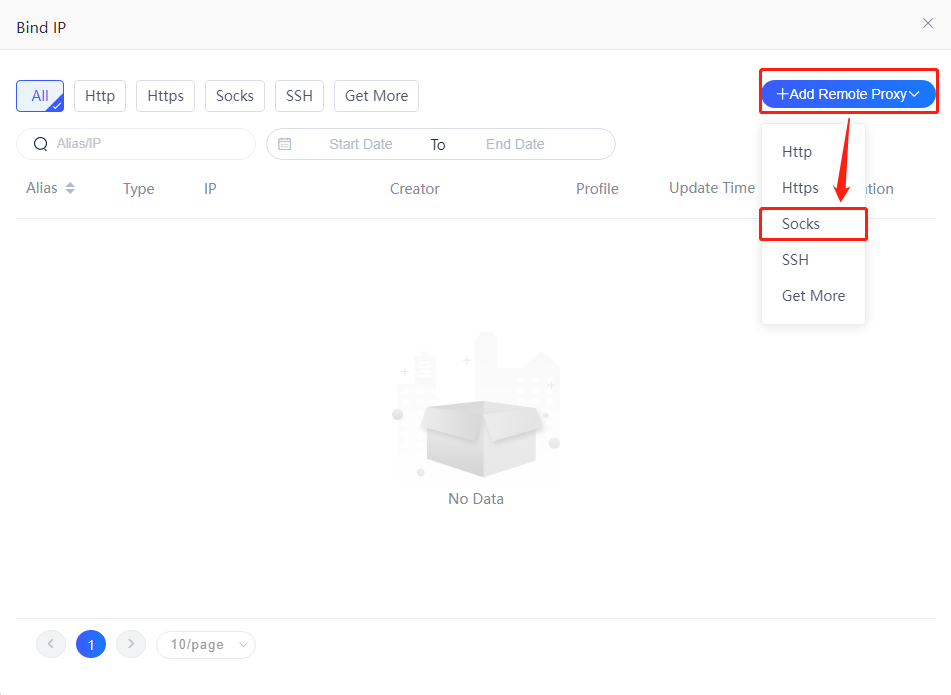
5. Then click Add Remote Agent, select the Socks protocol
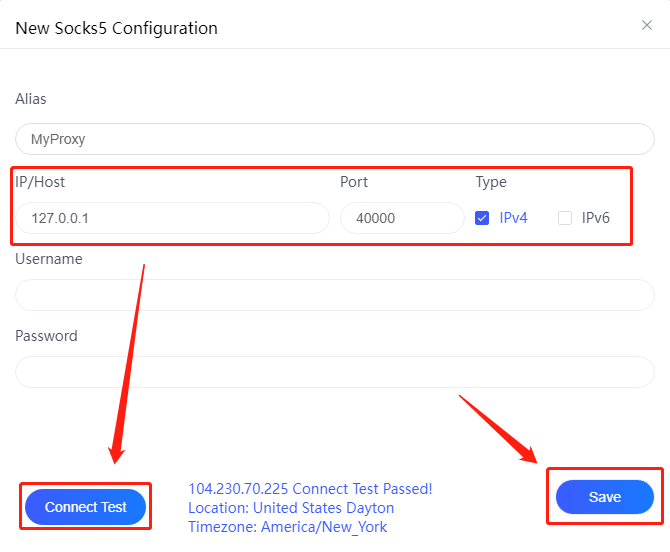
6. Then paste the proxy IP and port in, click connection test, and click save when finished
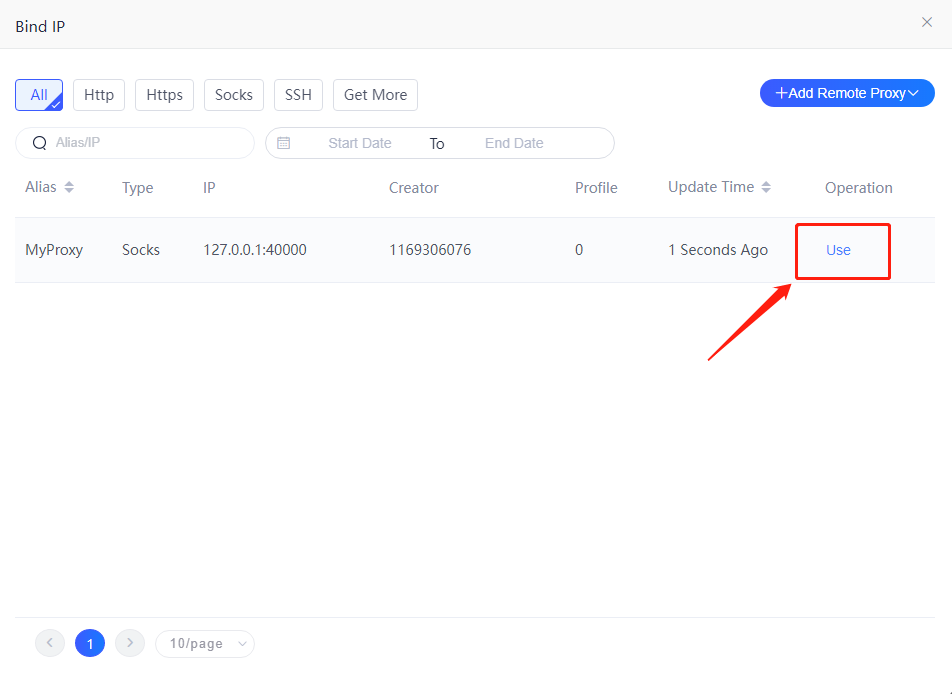
7. Click to use
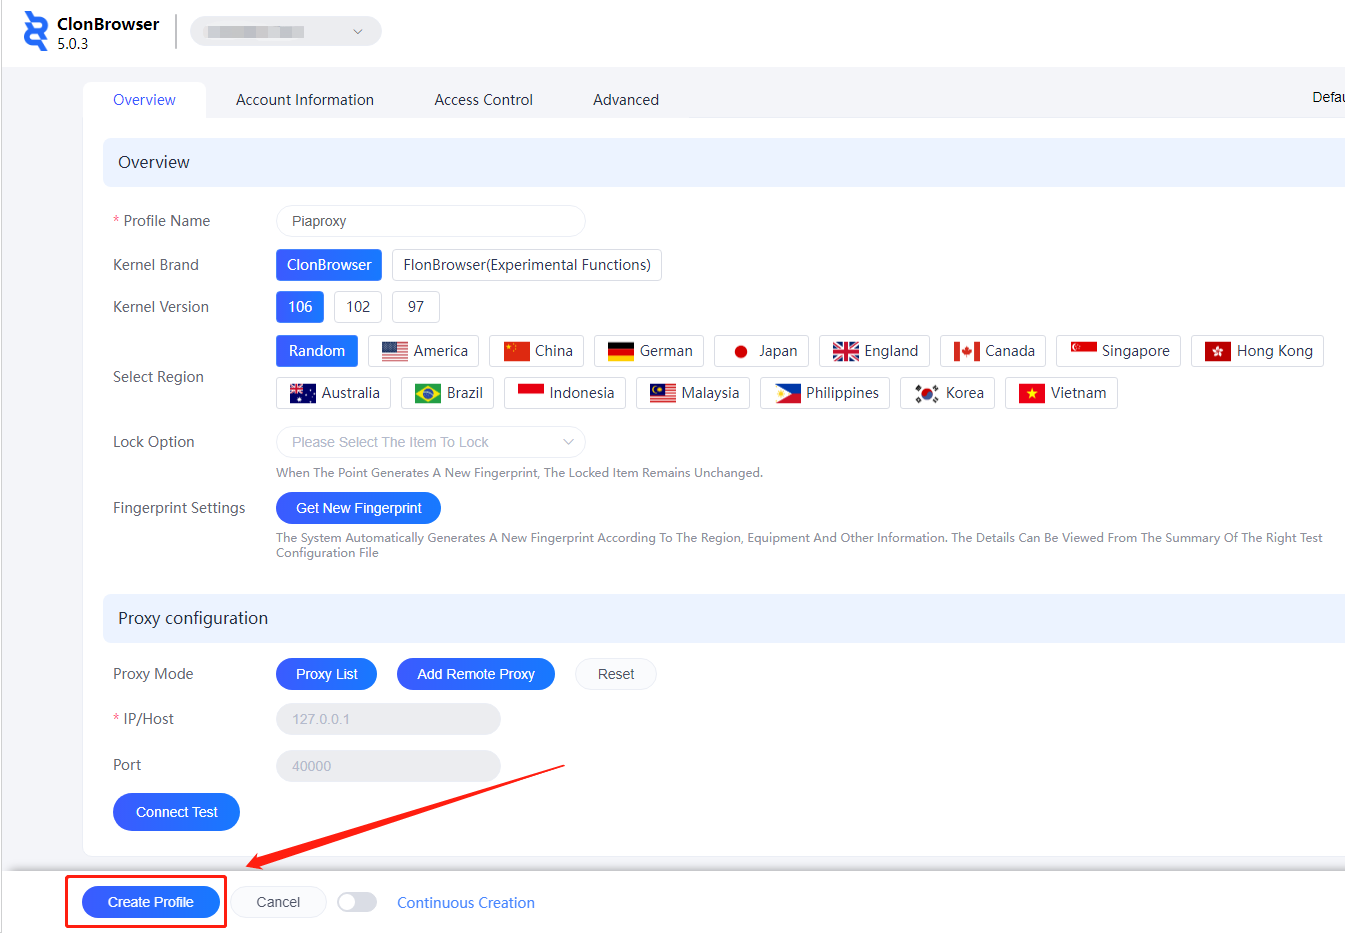
8. Click Create Profile
9. Save all settings and finally click "Start"

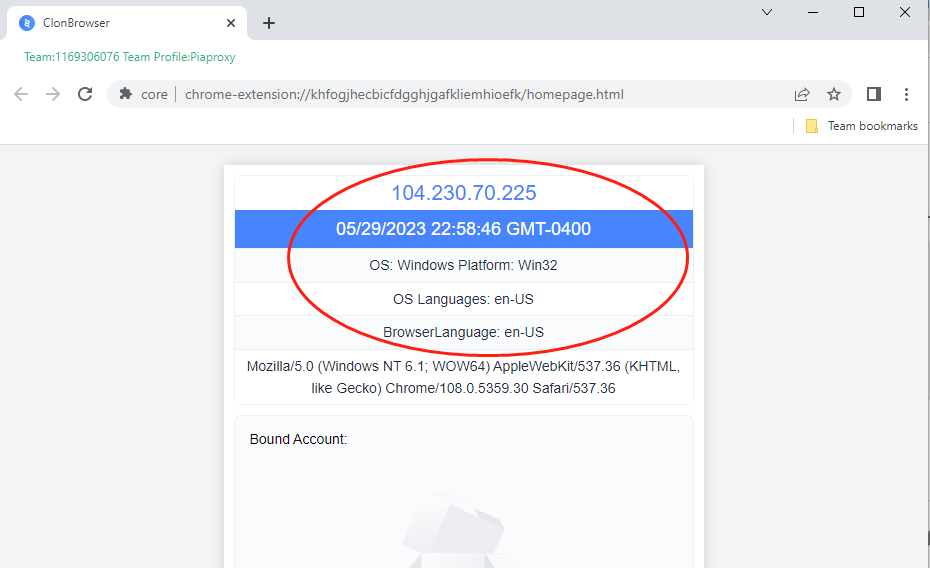
10. Now the proxy IP is set successfully
Click to view detailed video tutorial——
According to the above process, you can start using CloneBrowser. If you have any questions about the integration, or want to learn more about other topics, you can consult the online customer service for help


