How to set proxy server on Gologin browser
The advantages of Gologin browser include:
Easily manage multiple social media and email accounts without frequently logging in and out
Provides more advanced security and privacy protection features, such as preventing cross-site request forgery attacks (CSRF) and preventing ad tracking, etc.
Browser themes and plug-ins can be customized to meet the needs of different users
Supports multiple operating systems and devices, including Windows, Mac, Android, and iOS
Provides a fast and smooth browsing experience while consuming less system resources
step 1:
Download and install gologin
Website: https://gologin.com/?p=PIA
Step 2:
Add proxy settings
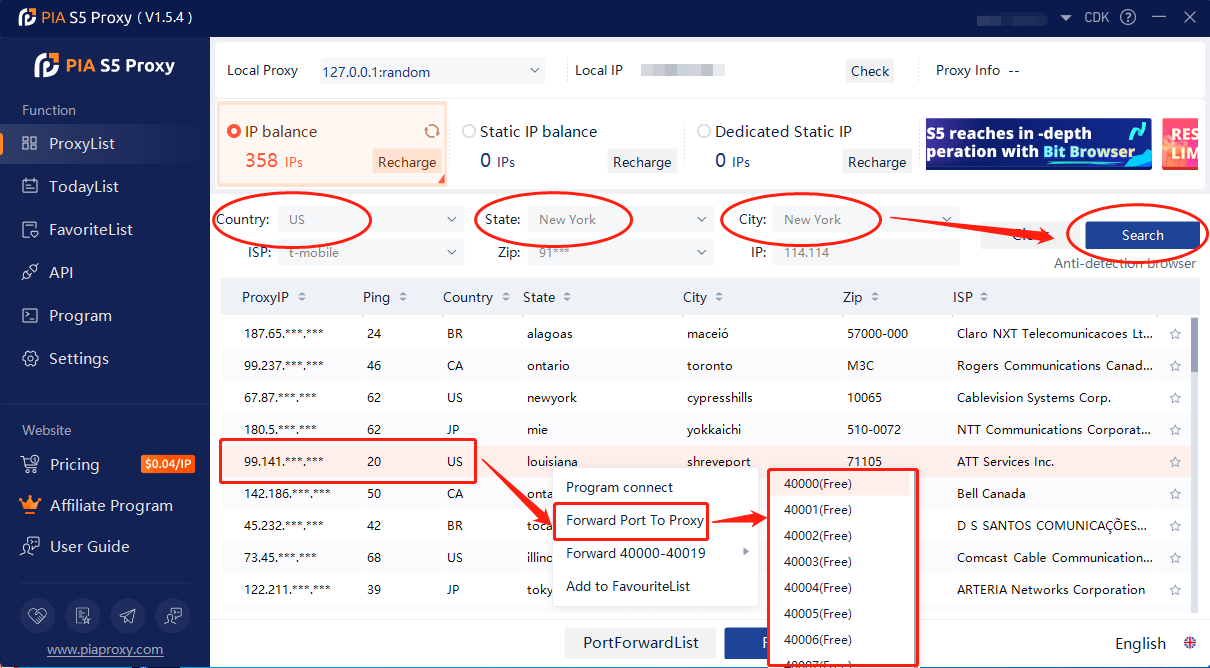
1. After selecting the country, continent, and city, click the "Refresh" button, then right-click to select the proxy IP and port
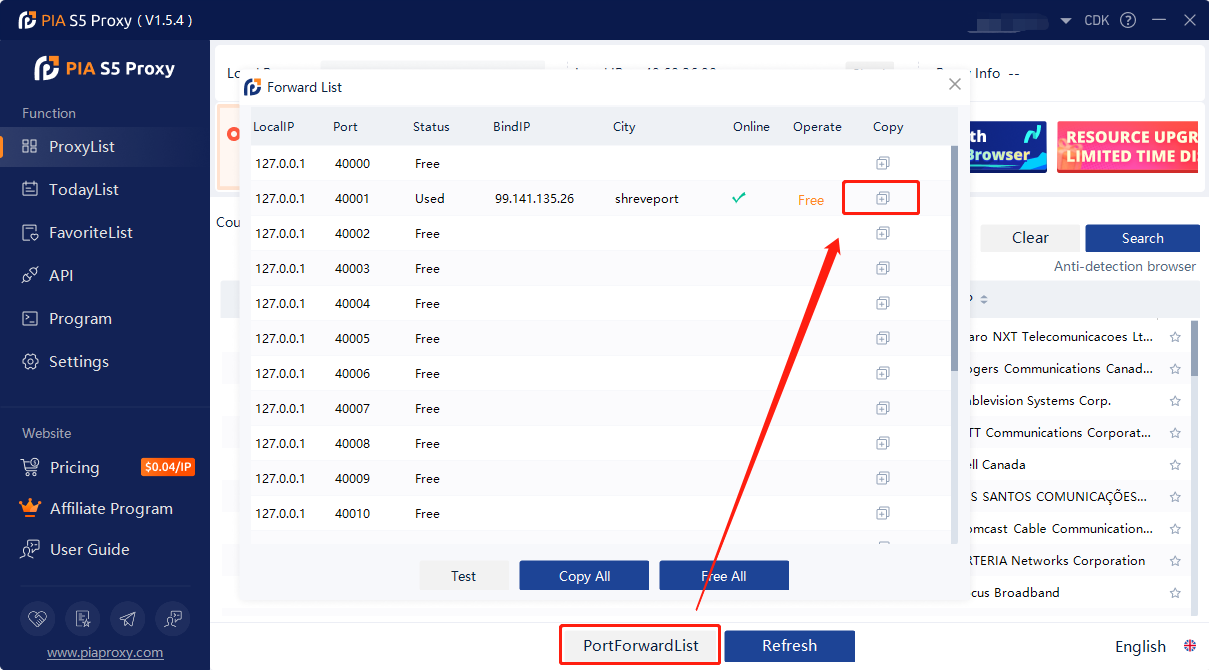
2. Then click the port forwarding list below and copy the port number you just selected
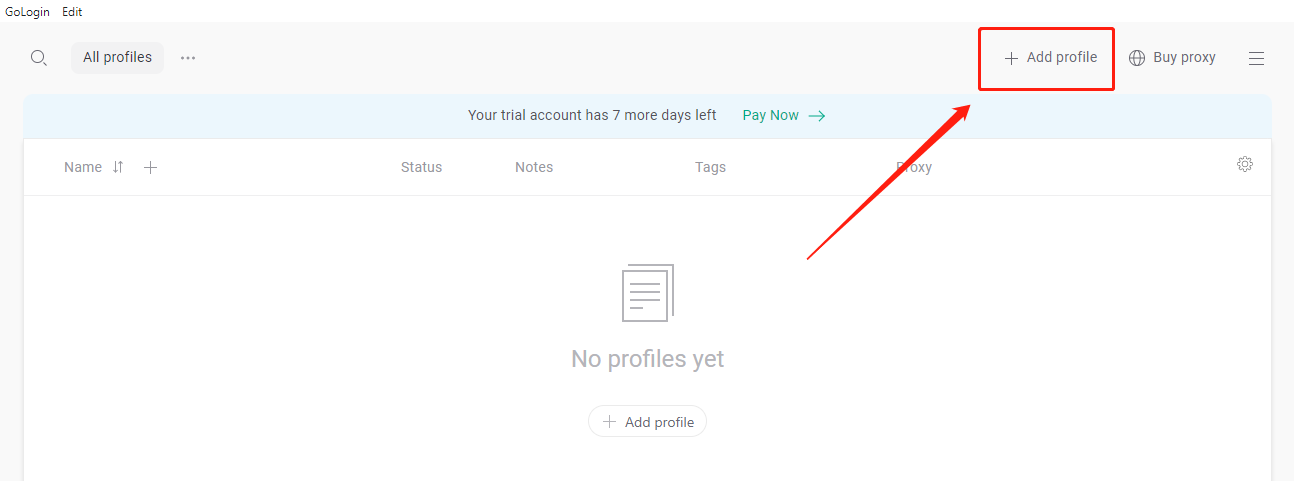
3. Open the Gologin browser and click New Profile
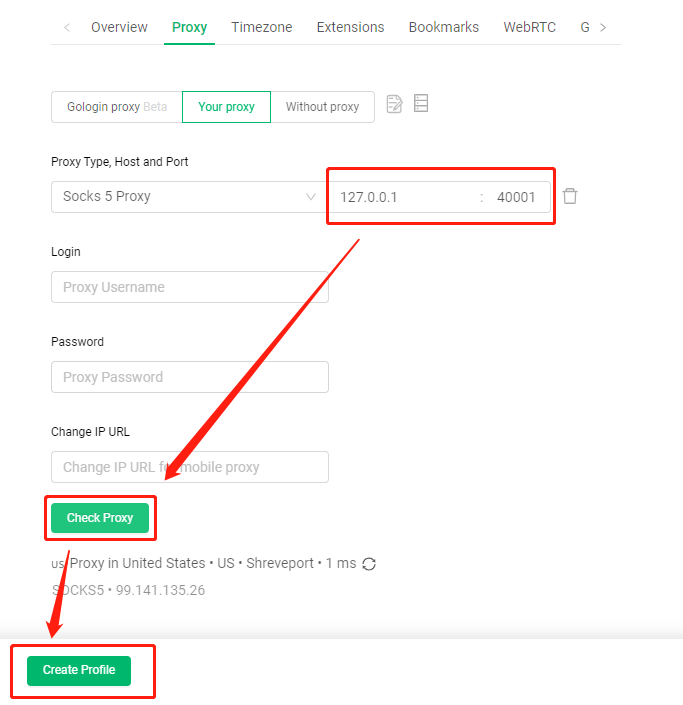
4. Click Proxy to select "your proxy", and select "socks 5 Proxy" for proxy type
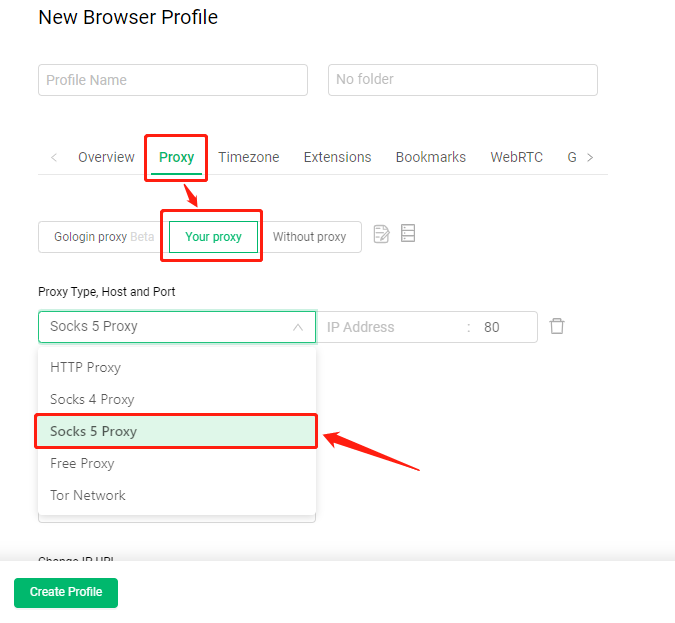
5. After pasting the proxy IP and port, click to test whether the proxy is connected normally, and finally click to create a configuration file
6. Then click "Run" to start the proxy browser

Click to view detailed video tutorial——
According to the above process, you can start using Gologin. If you have any questions about the integration, or want to learn more about other topics, you can consult the online customer service for help


